Anterior approach hip replacement
Total hip replacement approaches
Total hip replacement involves replacing the arthritic ball and socket of the hip with artificial parts. When surgery is carried out on a deep part of the body, surgeons must take care to respect the soft tissues such as the muscles, tendons, major blood vessels and nerves. This careful pathway to the surgical target is known as the "approach". For total hip replacement, three main approaches have been developed over the years:
-Posterior (through the back)
-Lateral (through the side)
-Anterior (through the front)
Patients can have a very successful result with any technique with a careful and well-trained surgeon, and total hip replacement is one of the most successful orthopaedic operations, regardless of approach.
The anterior approach
The anterior approach to the hip joint is also referred to as the direct anterior approach (DAA) or the AMIS approach (anterior minimally invasive surgery). Whilst it is relatively new in Australia with increasing use over the past 20 years, the anterior approach for hip replacement has been used successfully in Europe for many decades.
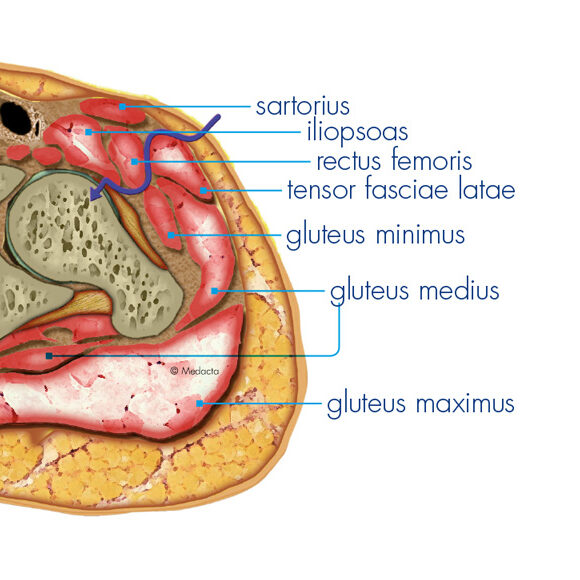
In the anterior approach, Dr Williams accesses the hip joint through a naturally occurring interval between the muscles on the front of the thigh. Unlike the posterior or lateral approaches to the hip, no muscles or tendons need to be cut (and repaired) to gain access to the joint, which can have the benefit of a more comfortable early recovery.
Potential advantages of the anterior approach
No muscles or tendons are cut
Improved stability of the hip joint after surgery
Less need for "hip precautions" post operatively
Less post-operative pain in the first 6-12 weeks
Smaller incision
Lower rate of revision for infection


Anterior Approach Surgical Technique
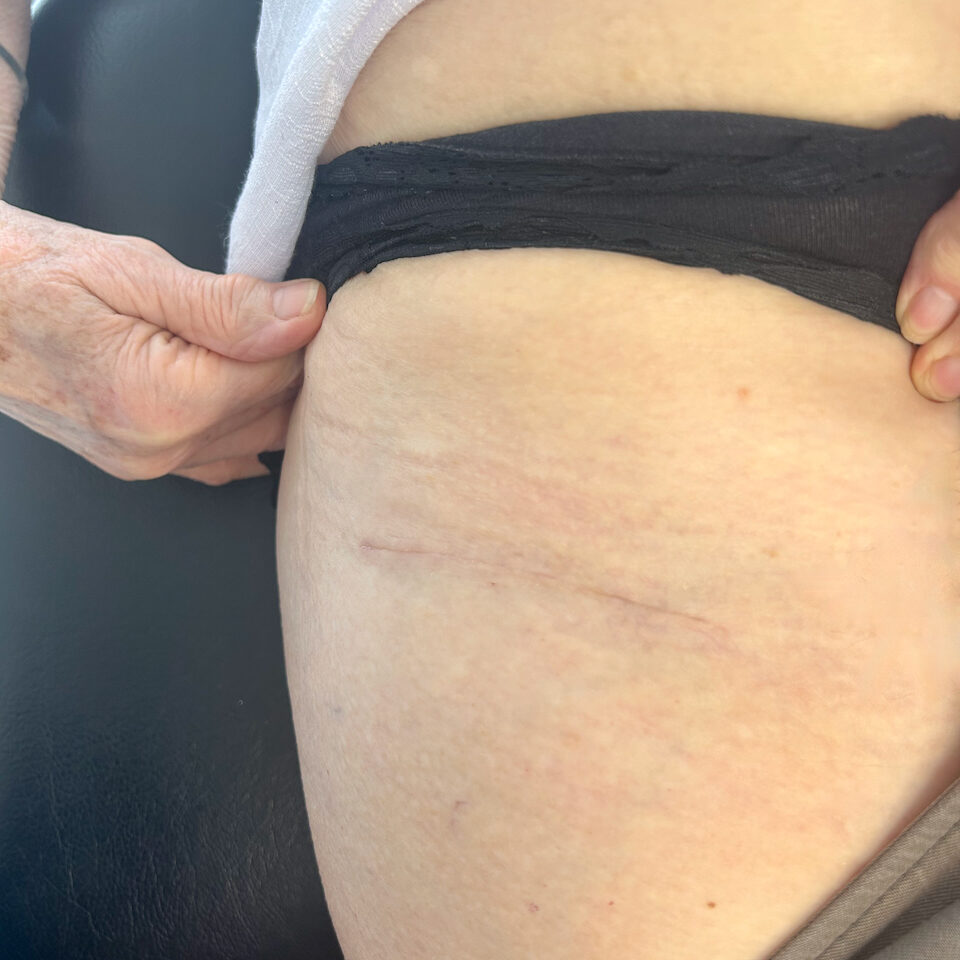
In the anterior approach, the patient is positioned on their back to allow easy access to the front of the hip joint. The standard skin incision is 6-8cm long, running vertically over the outer third of the thigh (not directly in front). Dr Williams also uses a "bikini" incision, running parallel to the groin crease depending on patient anatomy and preference.
Surgeons will either use an ‘on table’ technique which uses a specially designed leg positioning device or an 'off table' technique, which uses a standard operating table and requires the leg to be manually repositioned by the surgical assistant throughout the procedure. Both of these techniques have advantages and disadvantages and can provide excellent, reproducible results. Dr Williams uses the 'on table' technique as he finds it provides efficient and consistently good exposure even in patients with ‘difficult’ anatomy. This technique also allows the easy use of x-ray during the surgery to confirm accurate placement of the artificial hip

After the skin incision, the interval is developed between the tensor fascia lata and rectus femoris muscles to expose the front of the hip joint. The thick capsule surrounding the hip joint is opened and the arthritic femoral head is cut with a saw at the base of the neck and removed.
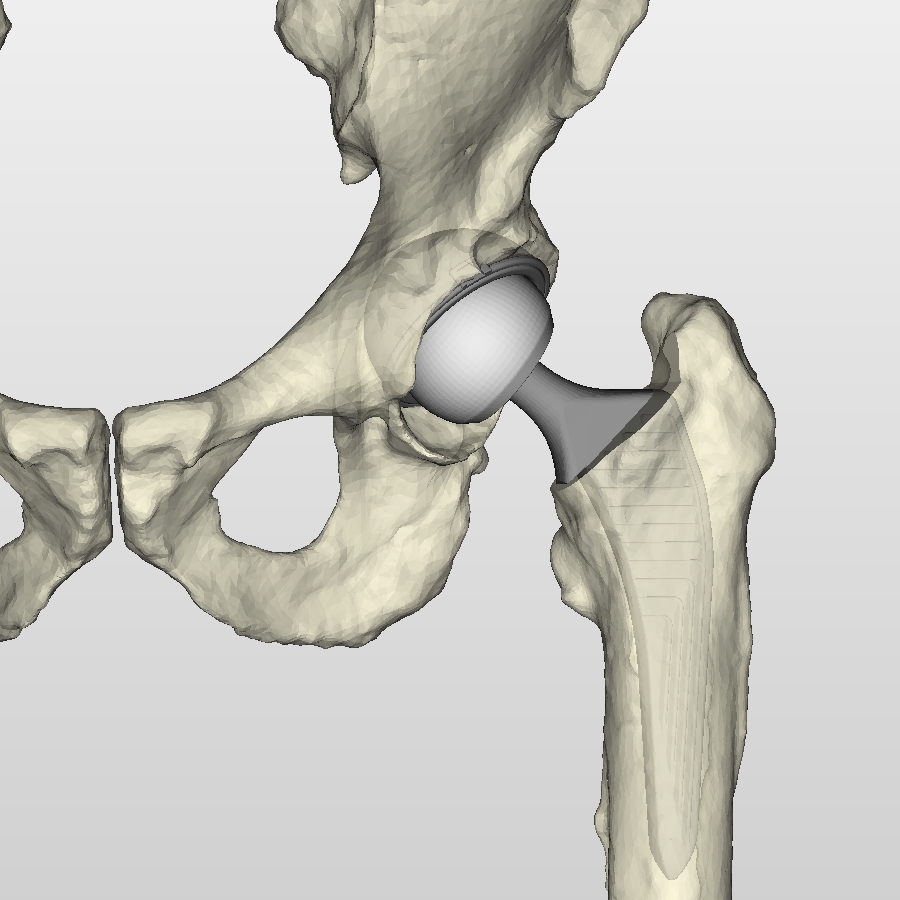
A motorised reamer is used to clear the socket of any remaining arthritic cartilage and a thin layer of bone. A hemispherical 'shell', made of titanium is impacted into the prepared socket, achieving solid fixation through a friction fit. Occasionally, 1-2 screws may be used as additional fixation. It is very important that the position of the acetabular shell is perfect in order to maximise how long the hip replacement lasts and reduce the risk of dislocation. Dr Williams uses live intra-operative x-ray to ensure that the depth and angle of implantation match the preoperative 3D computer planning as exactly as possible. Once the acetabular shell is firmly in place, a smooth inner 'liner' made of highly cross-linked polyethelene (medical grade plastic) or ceramic is inserted.
The top of the femur is then brought into the small surgical window through specific manoeuvres with the traction table and systematic soft tissue releases. The femur is hollowed out with sequentially larger 'broaches' (metal rasps that are the same shape as the implant), until the correct size is reached. A 'trial' reduction is performed with temporary implants to check that the hip is stable through a range of motion and the muscle tension is correct, before the permanent stem is inserted into the femur. In younger patients with good bone quality, the stem is usually impacted into place and gains long term biological fixation through a process of bone 'on growth' onto the specialised roughened titanium surface. In older patients, or patients with thinner bone, the top of the femur is filled with a liquid bone cement and a polished stainless steel stem is inserted and held in place until the cement hardens (6-11 minutes depending on the type of cement).
An artificial femoral head, made of ceramic, is impacted onto the neck of the stem and 'reduced' into the socket. To minimise the risk of infection, the joint is bathed in a dilute betadine solution for several minutes while final x-rays are taken. It is then thoroughly washed with saline, and finally injected with a combination of vancomycin (antibiotic) and tranexamic acid (to prevent bleeding). The various layers and finally the skin are closed with absorbable sutures and sealed with glue and a waterproof dressing.

Anterior hip replacement recovery
One of the advantages of anterior approach hip replacement is the immediate stability of the hip joint. Because no muscles or tendons have been cut, the soft tissue envelope around the hip is intact and so there is no need for "hip precautions", that are usually recommended following a posterior approach. Patients are usually also quite comfortable when sitting and lying down, as they are not lying on their surgical incision.
As part of modern Enhanced Recovery After Surgery (ERAS) protocols, most patients will stand and take a few steps on their new hip on the same day as surgery. We know that early mobilisation is the most important way to prevent complications such as deep vein thrombosis and pulmonary embolism. During your hospital stay, the physiotherapy team will show you specific exercises to get your new hip moving and show you how to mobilise with the use of a gait aid such as a walker or crutches. They will ensure you can independently get in and out of bed, toilet and shower yourself. If required, you will be shown how to navigate stairs. Every patient requires a different amount of time in hospital but most patients stay in hospital for 1-3 nights.